Friday, March 31, 2006
Thursday, March 16, 2006
New Bike on it's way!


WHAT: Redline Monocog 29” WHERE: www.redlinebicycles.com HOW MUCH: $470
Redline scored a quiet coup within the single speed world a few years ago with the introduction of the solid but inexpensive Monocog. Now, as 29” wheel bikes are gaining a foothold with a broader riding audience, and curious riders are wondering about how to get a taste of the potential of big wheels, Redline has introduced the Monocog 29”.
Nothing fancy here – a 4130 cromoly frame, one gear, rigid fork, and a stealth paint job hovering somewhere between military surplus and non-slip deck paint in terms of both appearance and utility – the Monocog 29” has one feature that should put it at the top of many “checkitout” lists; a $470 price tag.
That’s right, four hundred and seventy bucks, ready to ride. This is a screaming deal of a price for any bike. However, the Redline does it up right. It has big, meaty WTB Exiwolf 2.3 tires, an oversize Ritchey alloy rise bar, no-nonsense Truvativ cranks with a square taper bb, cartridge bearing, disc-ready hubs (our test rig actually had handbuilt wheels with Wheelsmith spokes and Velox rim tape, but I have a hunch that the production rides will be featuring machine built hoops) and a ride character that is anything but cheap.
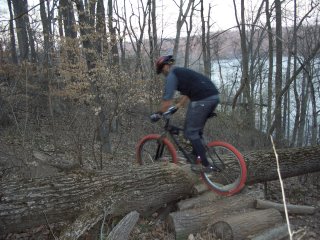
Trail manners are superb. So far, we’ve only managed to get about a half dozen rides on it, but it is a solid handling, stable, sure-footed machine. Chassis flex, something that can be an issue on flyweight bikes in general and lightweight 29” bikes in particular, was a total non-issue. The bike stays planted on the trail, and the wheels go where they are pointed.
Being completely rigid, and built with some stout steel tubing, you can expect to take some abuse from the trail. However, the big wheels, high-volume tires, and slender 26.8mm seatpost take the edge off the worst of the beating. Our 17” test bike hit the trail at a solid 27.5 pounds. That ain’t exactly light, but by that same token, the trail-friendly manners go a long way toward negating any perception of pudginess. It climbs well, holds a line well, feels bomber solid, and is a bunch of fun to ride. Can’t ask for a whole lot more than that.
The hubs and frame are ready to accept disc brakes, although the stock Tektro linear pull cantilevers do a decent enough job of slowing things down right out of the box.
It’s also a mightily upgrade-friendly beast. The hubs and frame are ready to accept disc brakes (although the stock Tektro linear pull cantilevers do a decent enough job of slowing things down right out of the box), and the rigid fork measures 465mm axle-to-crown with a 39mm offset. Swapping out to something like a RockShox Reba (which is about 470mm/39mm when sagged a quarter of the way into it’s travel) shouldn’t have much – if any – effect on the handling.
As far as flies in the ointment, at this price I’m really hard pressed to find anything to complain about. I wouldn’t mind if the handlebars were an inch or so wider. But honestly, that’s about it. The stock 32x18 gearing is right on the money for most off-road singlespeed duty. Everything works quietly and without fuss. It can handle epic all-day dirt rides, and it can double up as a fine corner store cruiser. It even does a pretty decent wheelie. What more could you ask for, really?
Thursday, March 02, 2006
Mounting a Camera to your bike!


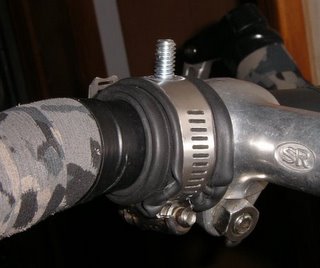
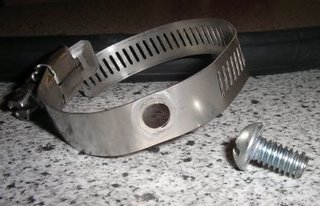
I got this idea after seeing the bottle cap tripod . I have a small digital camera that also takes video. I figured if I mounted it on my bike I could record some of my trips. So I thought I'd share how I did it for less than $5. 1/4-20 x 3/4 inch stainless steel pan head machine screwHose clamp long enough to wrap around my bars and wide enough to drill a 1/4" hole intoA few 1/4" WashersOne 1/4" lock washerAbout 1 foot length of bike tubeA digital camera that has a tripod mountDrill a 1/4" hole in the hose clamp. Put screw into hole in hose clamp. Wrap the bike tube around your handlebars. Attach hose clamp around bike tube with screw facing up. Screw camera on for test fit. Remove camera and experiment with number of washers needed to fill empty space. Last washer should be a lock washer. I ended up using a piece of folded over duct tape with a hole poked through it instead of a lock washer. Experiment with whatever you have until the camera feels solid tightened down and pointing forward.The video is not the best quality, but I think it's good enough. If you did something similar and mounted it to your helmet, it would probably be a bit more steady, but way more dorky.


